The CMSIS Packs manager
Contents |
Overview
CMSIS Packs are a Keil/ARM technology, intended to handle distribution of software and documentation in Keil MDK. The main difference from usual libraries or source archives is that the actual source/object files are accompanied by some form of metadata, defining, among other things, the registers and peripherals definitions.
These definitions can be used during debug sessions to display the peripheral registers.
Limitations
The current Keil/ARM packs are intended for Cortex cores only.
From the metadata present in the CMSIS Packs, only the peripheral registers are of interest for GNU MCU Eclipse users.
Prerequisites
To have access to the new packs features, you need to install the GNU MCU Eclipse Packs Support plug-in (currently with experimental status):

The Packs Support plug-in
The GNU MCU Eclipse Packs Support plug-in is intended to manage (list/install/inspect/remove) packs from multiple sources. It currently implements the specifications of CMSIS Packs, as defined by ARM/Keil, with some extensions.
Configuration
Before starting using the packs, it is recommended to check and adjust the folder where packs are downloaded and un-archived, since this cannot be changed later (in fact it can, but by doing this you loose all installed packages and need to download them again).
By default, this folder is called Packages and is located at the same level as the current workspace.
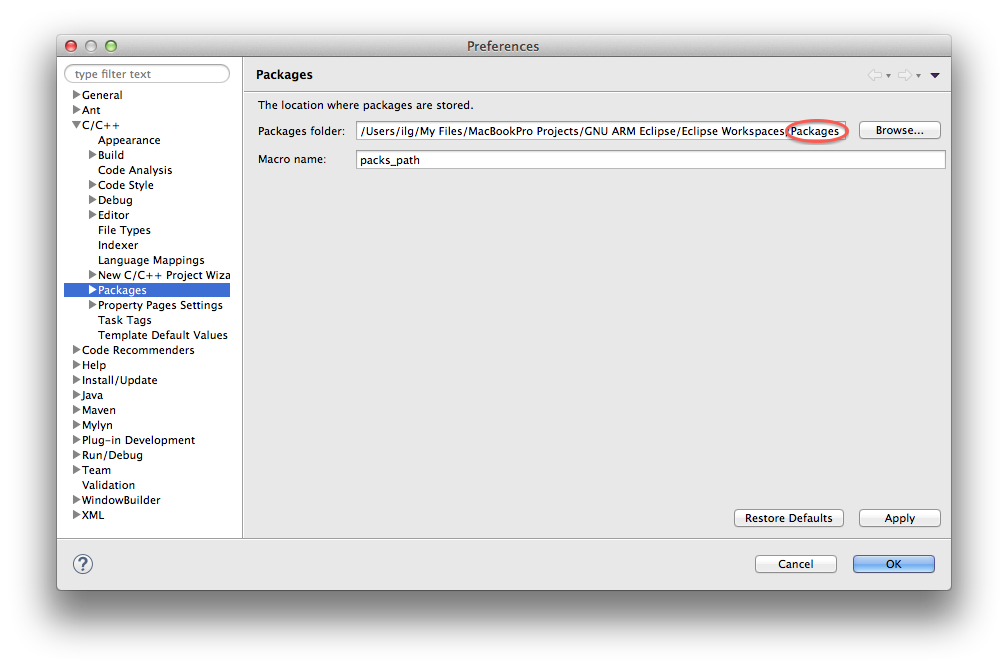
If you use multiple Eclipses with multiple workspaces, it is recommended to adjust this path to a single location and have the same packs install folder for all workspaces.
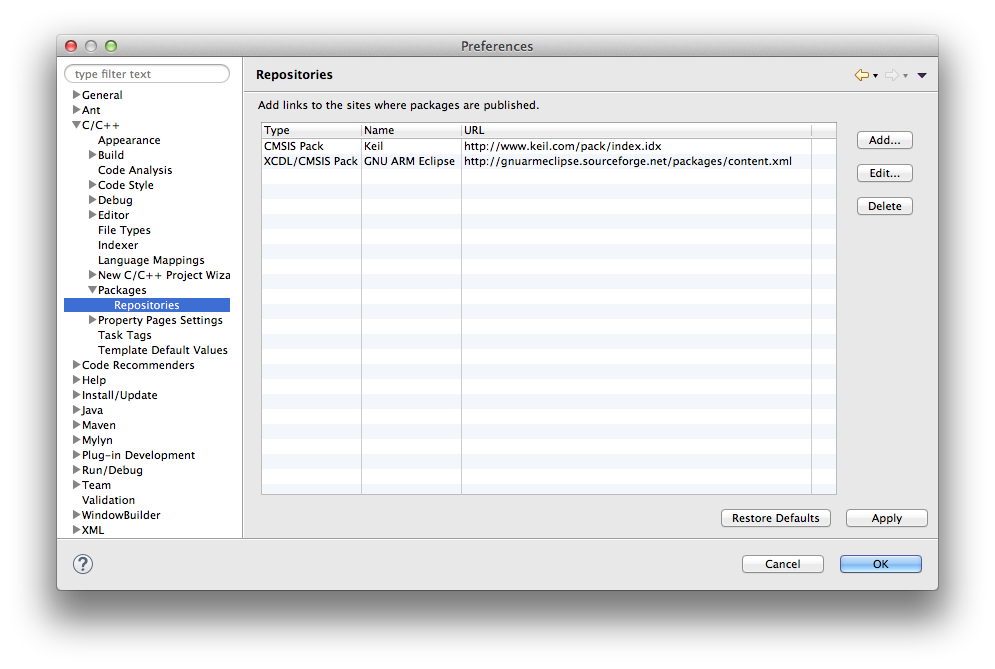
The plug-in also provides a page to configure which sites are used to load packs. Currently only the Keil URL is relevant, but in case others will appear, they can be added to the list.
The Packs perspective
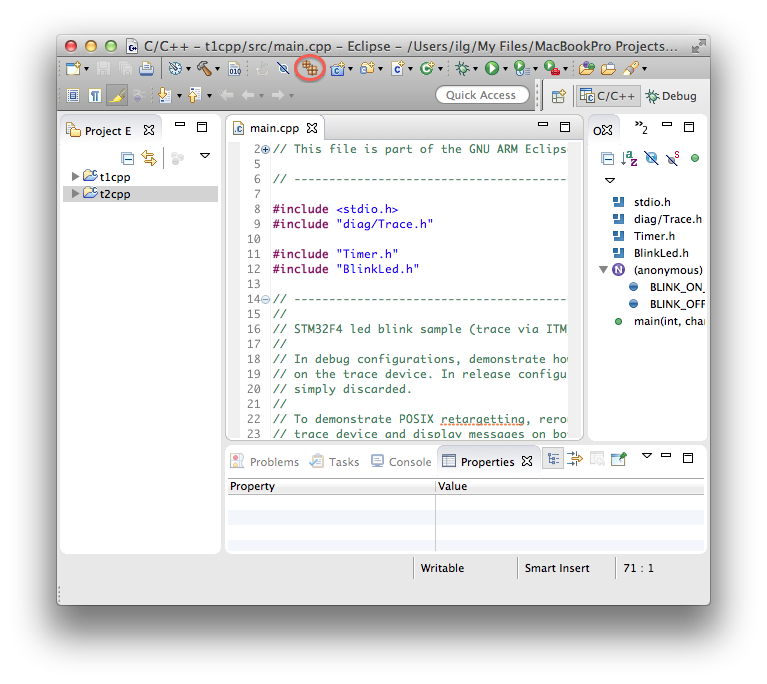
The packs manager uses a separate perspective, with selection views and outline views. To make this perspective visible, click the Packs button available on the Eclipse toolbar:
Alternatively you can:
- go to the Eclipse menu → Window → Open Perspective → Other…
- select the Packs perspective in the list.
The result is a window like this:
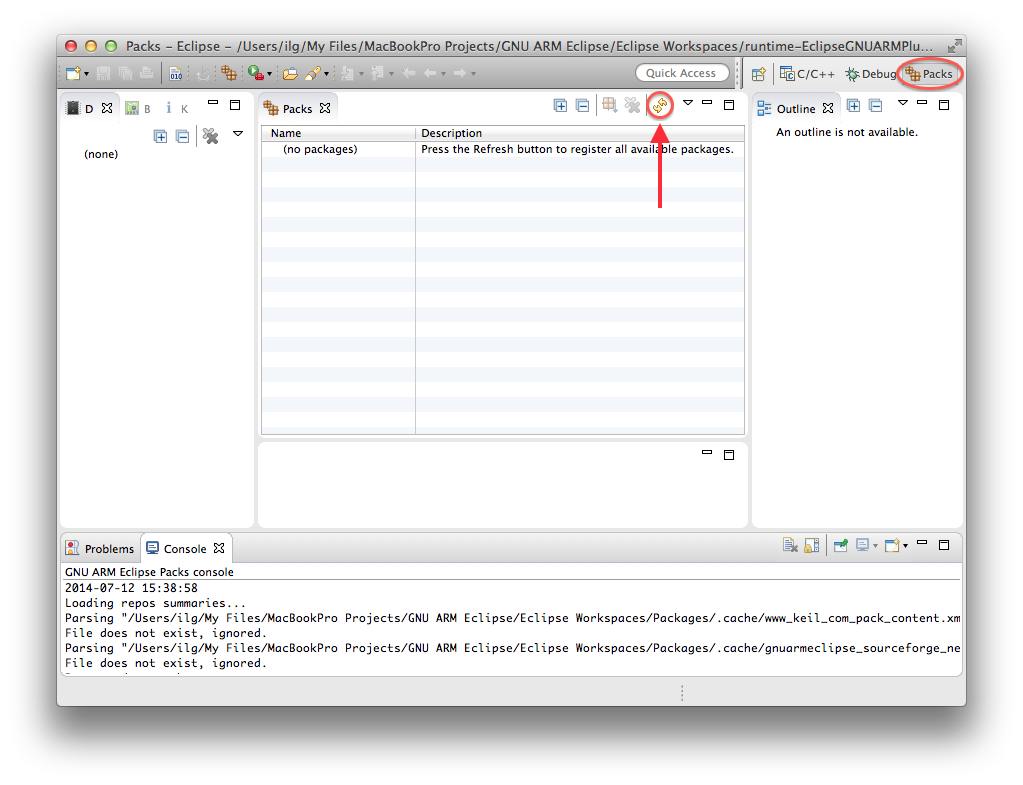
Initially all views are empty; to populate them, the plug-in needs to access external packs repositories; for this be sure the internet connection is active and click the yellow arrows Refresh button. (Since at first this is a bit tricky to spot, it is marked with a red arrow on the above picture).
After a few minutes, the window will change and show the list of packages:
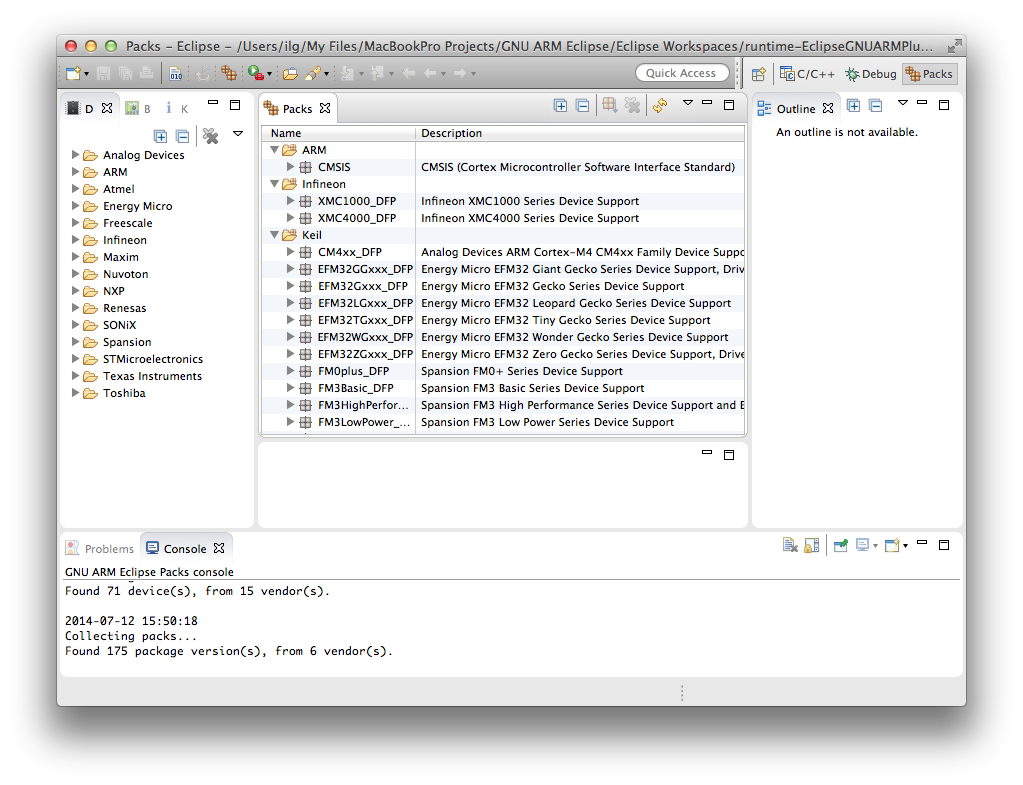
The structure of this window is generally in line with usual Eclipse guidelines:
- the middle part shows the available packages, and here various actions (install/remove/show outline) can be applied
- the left part is dedicated to various filtering criteria, like Device, Board and Keyword; clicking on any filtering nodes updates the list of packages to only those having relevance to the filtering criteria (multiple selection is allowed)
- the right part is dedicated to displaying various outline views
- centrally, below the main view, is the place where editors can be opened
- the bottom part is used to display the packs console, where various actions related to packs activity are displayed.
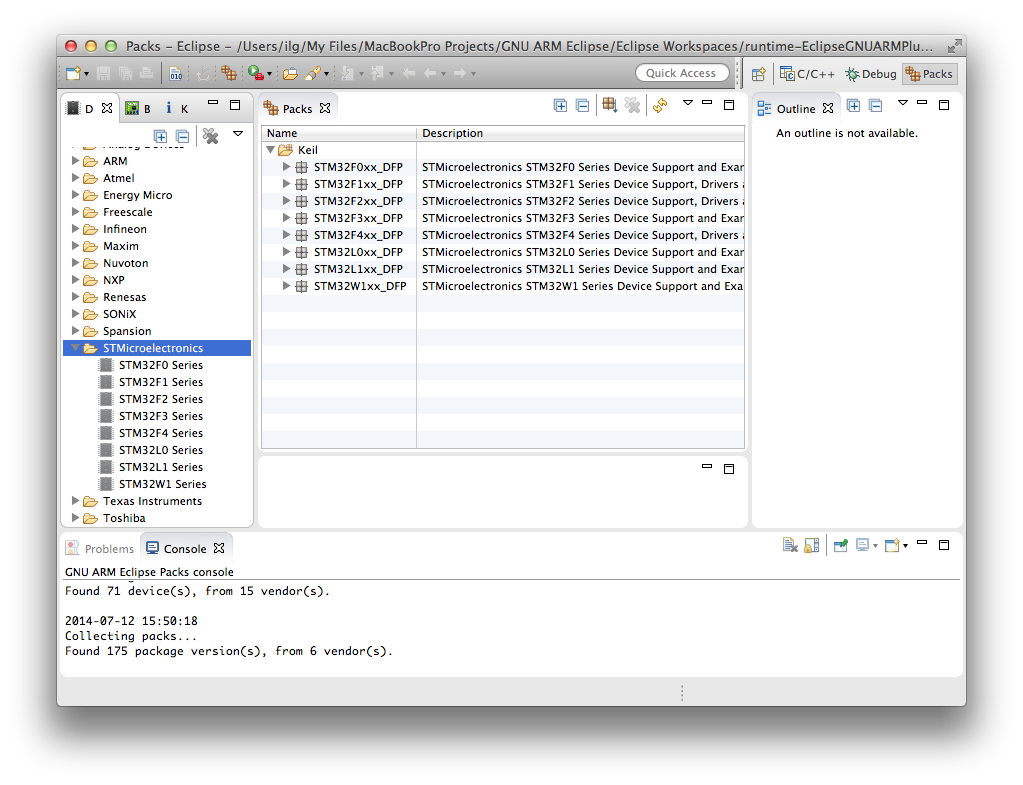
Filtering
To easily find the desired packs, several filtering criteria are available: Device, Board and Keyword. The usual usage scenario is to filter by device vendor, which will reduce the list of packages to those referring to all devices produced by the device vendor. For this select one or more vendors in the left window:
Similarly you can filter by one or more devices, even from multiple vendors, and the list of packs will be reduces even more:
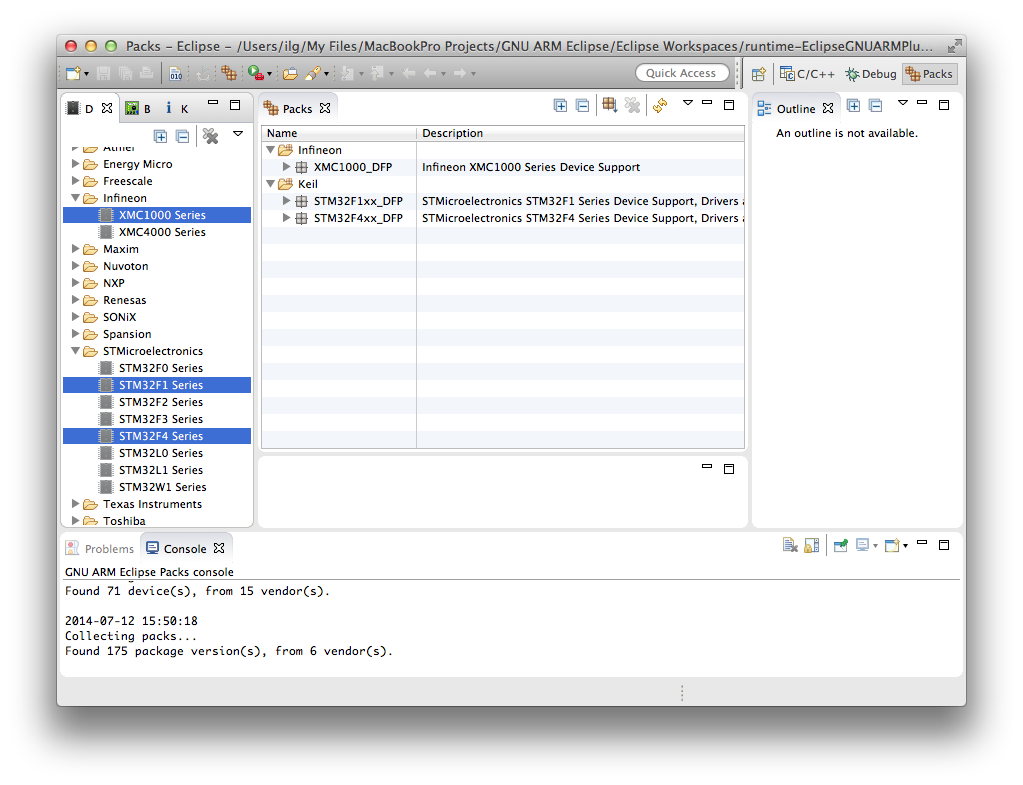
Similarly you can filter by boards and keywords, switch to the corresponding view in the left window and select the desired filters (with multiple selections possible).
Pack versions
Each pack may have multiple versions. Generally these versions should be preserved, at least a while, when new releases are issued, to help applications cope with possible incompatible versions.
All current and past versions are shown in the packs tree below each package node:
Brief outline
For all existing packs, the plug-in can display a brief outline, with the main content items: the supported devices, the supported boards, the components, bundles and examples.
The brief outline is displayed in the right window, when an uninstalled package or the latest version is selected (see previous picture).
Pack install
Once the desired packages are identified, they must be installed, i.e. copied locally, so that their content can be made available to the various projects.
Usually you would need to install the latest available version, but, for special cases a specific version can be also installed. For this you need to select either the package or the version, and click the Install button in the view toolbar:
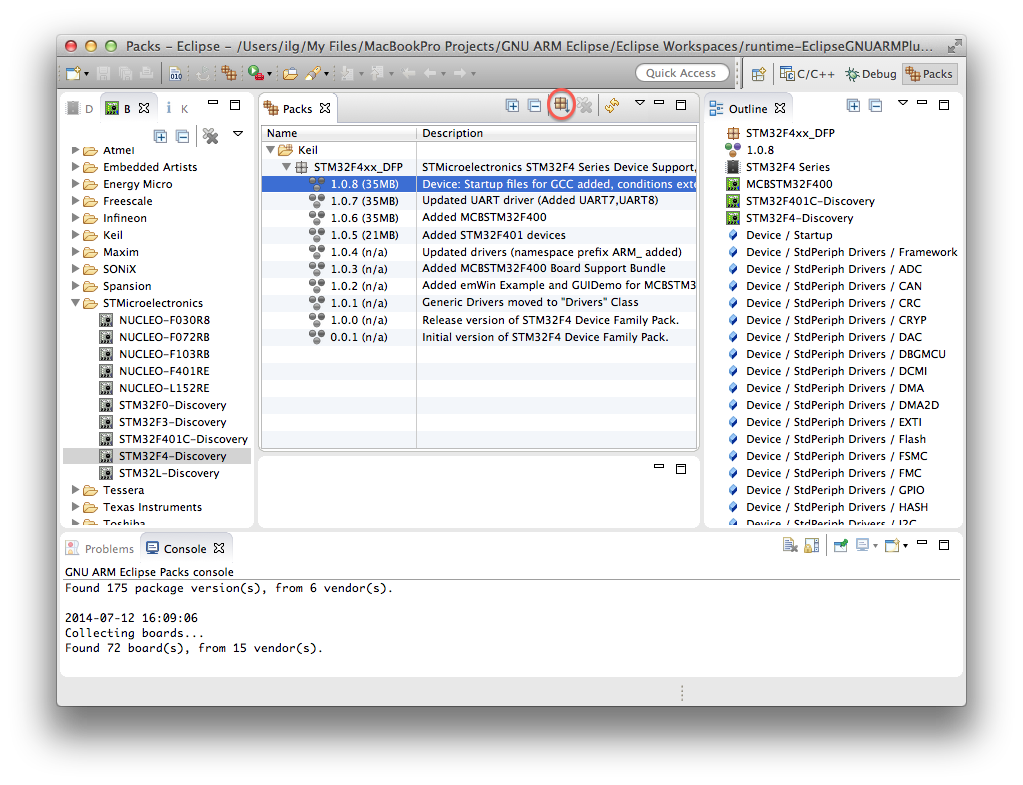
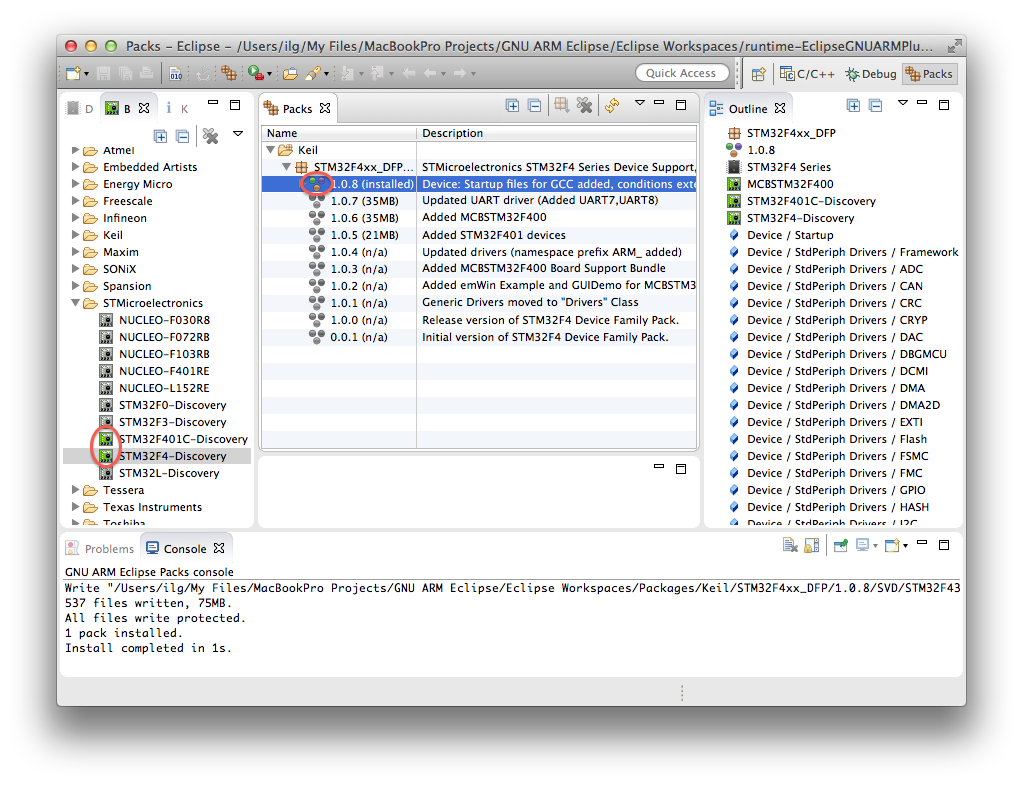
The result of this action is the download and unarchive of the desired packs, followed by write protecting all files, to protect them from inadvertent changes. To differentiate installed packages, the icon, initially grey, lights up in colour:
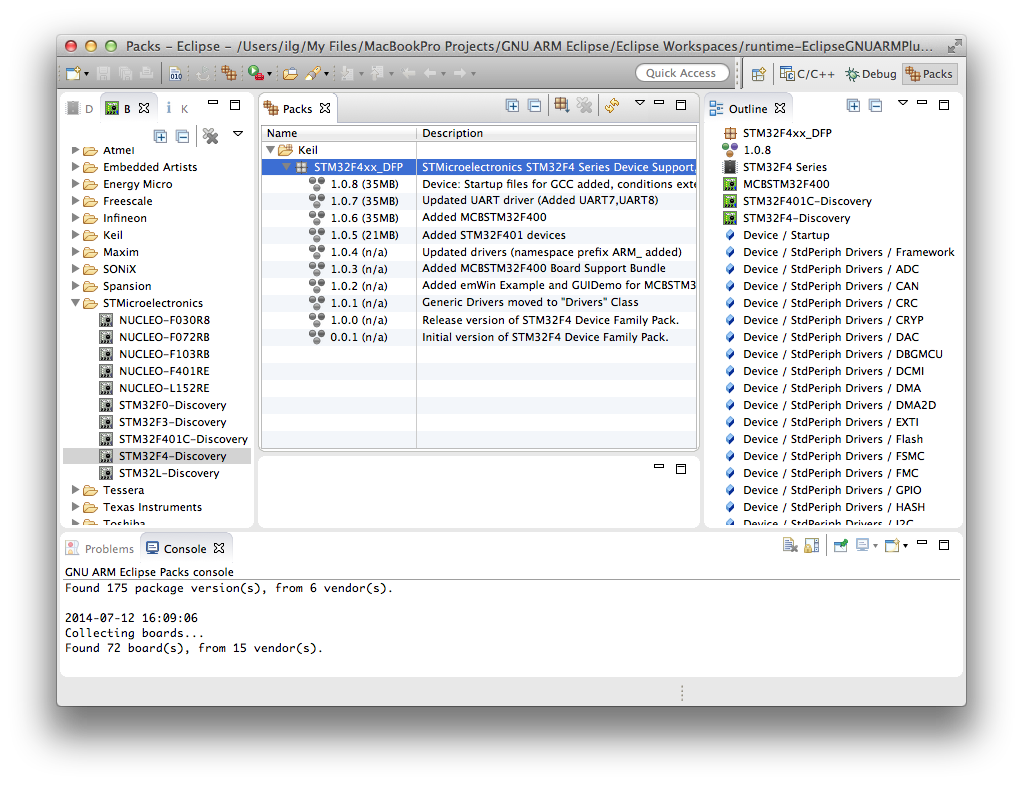
Full outline
Once a package is installed, you can get the full outline of the pack version by selecting the desired version. This will trigger an update of the outline window, with the brief outline being replaced by a full outline.
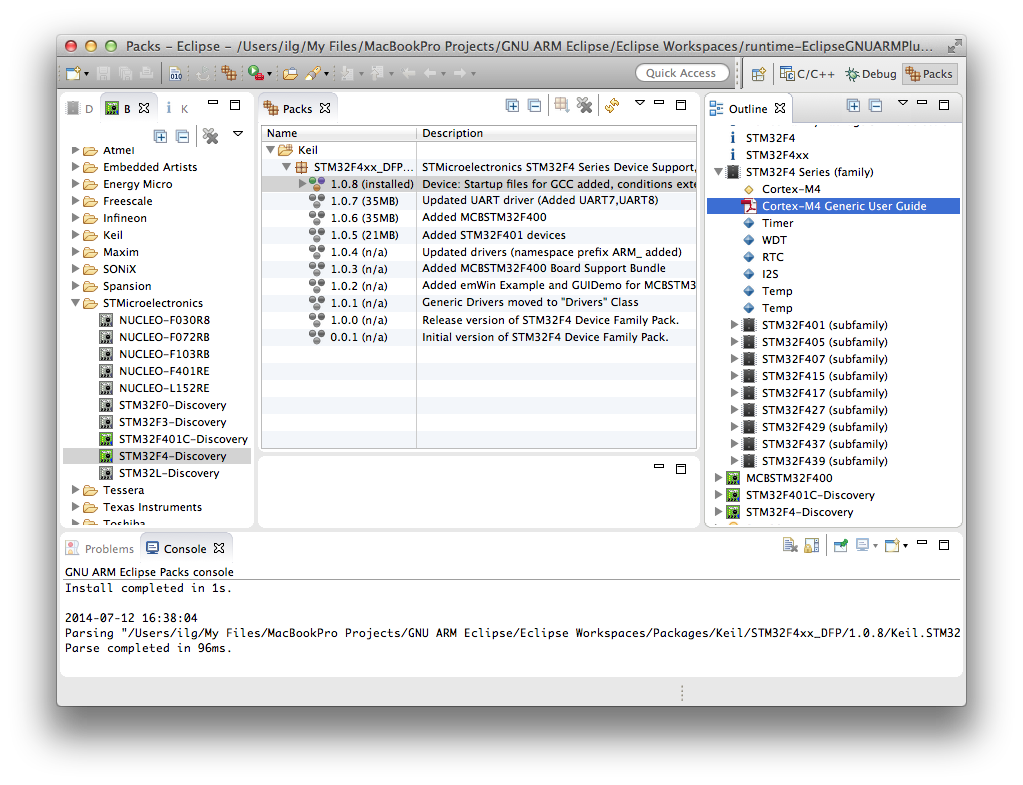
The full outline is a multi-level tree. Moving the mouse around brings new tooltip windows, where full details are displayed.
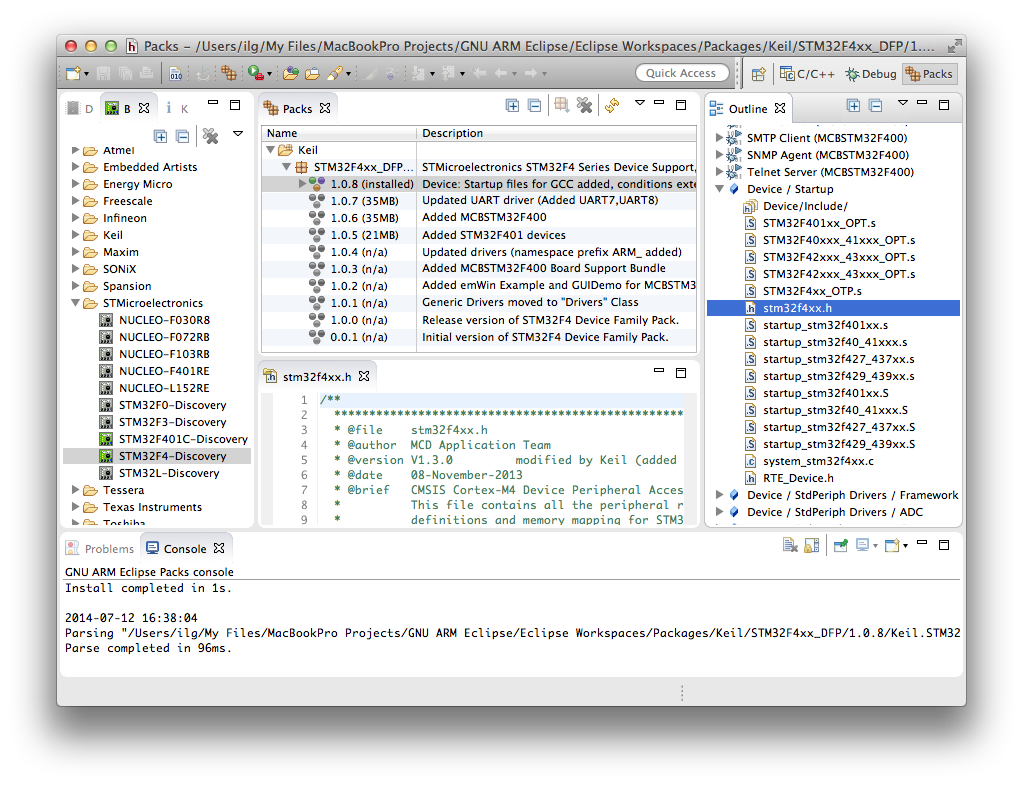
Most of the packs include various documents, either as local PDF or CHM files, or as links to web documents. Double clicking them opens the appropriate viewers for your platform.
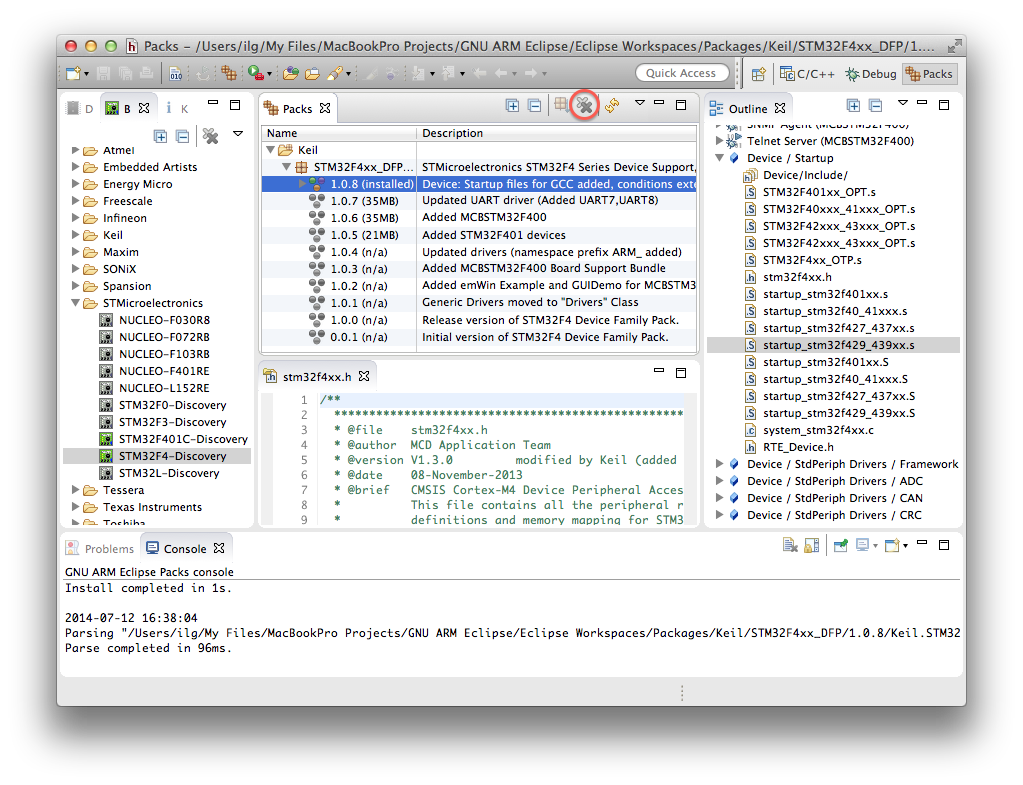
Double clicking source and header files opens them in the main editor window:
Pack uninstall
If the packages are no longer needed, they can be removed from the local folder, in order to save space (some packages can be hundreds of megabytes long).
To achieve this, select the desired pack version, and click the uninstall button available in the view toolbar.
Uninstalling a package version removes both the archive and the unarchived folder, then changes the icons back to grey.
Examples
For installed packages, the plug-in presents the list of available examples below each pack version.

For selected examples, the outline presents details about the content of the example.
With right click, you can copy one or more examples to separate local folders. Unfortunately the examples currently available in the Keil packages can be used only with Keil MDK, so are of no direct use for Eclipse and GCC environments.
Future developments?
Initially CMSIS Packs were considered a great technology, worth investing in.
Later on, the limits of the technology were revealed, especially the tight connection to Keil/MDK and ARM tools.
For the moment all plans to further develop CMSIS Packs are postponed, and resources are directed to xPacks, a more flexible technology.
